Adventure School participates in the Amazon Services LLC Associates Program, an affiliate advertising program for sites to earn advertising fees by advertising and linking to amazon.com

Camping and fire go together like Christmas and cocoa. Most people don’t even think about going camping without fire. I. I don’t like having fires while camping unless I need it to cook or stay warm. know I’m definitely in the minority here. People love campfires. I get it. They’re mesmerizing, relaxing, nostalgic, and magical. I don’t disagree with that, but I just don’t think its’ worth it most of the time. Ask me my thoughts on why another time…
Today, we’re going to assume that we’ll all be camping with fire! My goal is to teach you how to use fire responsibly, safely, and confidently so you can enjoy your adventures more fully.
Planning ahead to avoid fire issues
Your best campfire begins well before you leave the house for your campground. Bringing the right gear, checking for current restrictions, and knowing what facilities and resources to expect all go into having a campfire to roast s’ mores and hotdogs on.
If you’re looking for other ideas of how to cook with your fire, read this post: 77 hack for camping this summer
Check for fire restrictions
Nothing is worse than packing tin foil dinners, hotdogs, s’mores, and firewood to find out that campfires are not allowed at your campsite. It’s your responsibility to know what restrictions are in place, but how do you find out?

Here’s a list of resources for all the states I could find that had one:
Check the current report for any fire restrictions for the location you’ll be camping in and then follow the rules! Even if fires aren’t prohibited, hazardous conditions may make campfires a very bad idea.
Plan for firewood
Even if fires are allowed, most places don’t allow you to bring firewood from outside the region and many also don’t allow on-site gathering of firewood as it disrupts the ecosystem to strip all the dead wood out of it. If that’s the case where you’re headed, be sure to buy or collect acceptable firewood before you head out. The best-case scenario is that you’ll be able to buy it near the campsite for an arm and a leg. Worst case, you’ll have no wood to burn and no fire to enjoy.
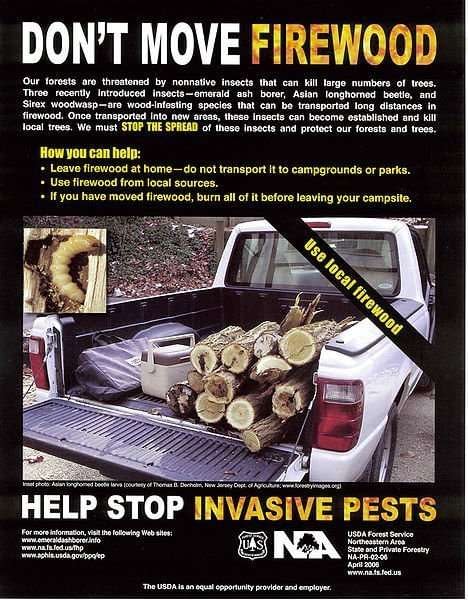
The reason firewood is restricted is because of invasive insects that hide out in the wood and then run out into the new forest when the wood gets thrown on the fire. This issue has led to the destruction of many forests, so it’s a big deal. Use only local wood.
You’ll also want to plan around the weather. With the right skills, you can almost always find dry wood to burn, but sometimes taking the dry wood is bad for the environment. Dead trees (living trees should never be harvested for firewood!) that are still standing stay dry even in wet weather, but they are often home to various animals and shouldn’t be felled so you can roast marshmallows.
So part of your planning will be to bring dry fire starting material as well as dry firewood if the weather will be wet.
Plan your gear
If you’ve read any of my posts, you’ll quickly pick up that I’m a big planner. I sometimes fail to plan for campfires because I don’t really like them, but if I know I need one for cooking or to keep people warm, I make sure to plan the right gear for a fire.
What do you need? Not a ton, but you do need gear to safely and responsibly make a campfire.
A shovel
A shovel is needed to dig a firepit if you’re not using an existing fire ring. You also need a shovel nearby so you can quickly stir or fill the fire up with sand or dirt.
-
 Foldable Camping Shovel$19.95

A bucket
A bucket of water is essential to a safe fire. Many people don’t do this, but please plan to have some kind of container of water nearby large enough to douse your fire.
-
Collapsible Bucket$10.99

Fire starting tools
This one is obvious, but I’ve seen people stuck without lighters, matches, or flint and steel before. Don’t do that!
-
Bic Lighters$13.98

A bit more on fire starting tools
My preferred method of lighting fires is with a simple firestick lighter. These are easy to use, cheap, and readily available. You can also use them to light your camp stove. I prefer these over matches because they can reach specific spots deep in your campfire better, don’t go out as easily, and are waterproof.
You can also bring matches, and I do pack waterproof matches in my emergency bag just in case…
I also have flint and steel in my kit as a last resort, but if you plan to use this to actually start a fire, you should practice first when the stakes are low.
Practicing your matchless/lighterless fire starting is a great camp activity, during activity downtimes.
Here’s a great ferrocerium fire starter that I like to pack in my emergency kit.
-
 Spark-Lite Fire Starter$10.99
 -
Product on saleFire StarterOriginal price was: $29.99.$22.90Current price is: $22.90.


Pick your campfire location
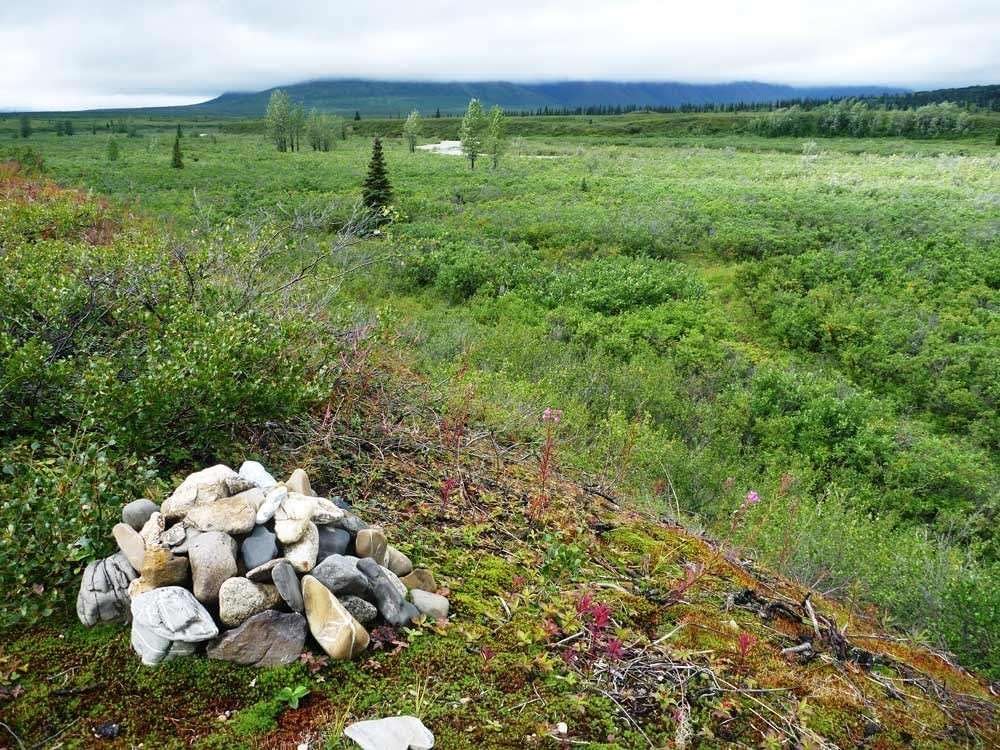
Once you show up at camp and you’re ready to build a fire, it’s important to consider the location first. Fire rings should be a prime consideration in picking your campsite to begin with if you plan on having a fire. Pick a site with an existing fire ring and avoid having to build a new one and do more damage to the land.
An established fire ring is usually a safe bet, but be sure you can clear an area of around 15 feet (5 meters) in diameter of anything flammable including grasses, leaves, wood, or items you brought with you like your tent.

Also, look for any overhanging foliage that could be damaged or ignited by the fire. If you can’t clear a big enough area, look for a better fire ring or consider keeping your fire small and well-controlled.
Prepare the fire ring
Now that you’ve found a good site for your fire, you can clear it of flammable material and then dig a small pit. Surround the pit with rocks if they’re available if not, dig the pit deep enough to contain any embers or coals. If you can’t dig a pit, try to build the fire inside a mound of mineral soil such as sand or gravel. Try to avoid using rich organic soil as the fire will kill it.

Gather your materials
Once you have your fire ring built you’ll need stuff to burn – specifically tinder, kindling, and fuel
Tinder
-
Product on saleFire StartersOriginal price was: $25.89.$22.79Current price is: $22.79.

No, not the dating app tinder. This tinder is much more useful. Tinder is the fine and very flammable material you’ll use to catch the first flame or spark with. you can use commercial or homemade fire starters as your tinder.
Here’s one many people like, but I’ve never used one of these kinds before.
You can also make your own using all kinds of common items like chips, cooking oil, cotton balls, pine cones, sawdust, wax, dryer lint, and I’m sure plenty of other fun things. Just google it to learn.
I hardly ever bring firestarters, but I do have a couple of tea light candles that I use if I get desperate.
I like to use native materials that I can find to start fires. It’s part of the fun of fires for me. “Can I start it with nothing but what I find?”
Of course, if you have cold, wet, hungry kids waiting for you to get a flame burning, don’t rely on this method (Ask me how I know. ????).
So gather whatever kindling you plan to use. I often use dry leaves, juniper bark, pine needles, or dead grass. Sometimes in the middle of the desert where little wood is available, I pack in my own firewood and I’ll use wood shavings as my tinder.

Ensure the tinder is ground down very finely so it can easily catch a spark or flame and build a little ball out of it.
Kindling
Kindling is the next layer to your fire. This should be dry sticks and twigs starting with small diameters less than the size of your fingers, working up to around the size of your thumb. I like to make a neat pile of kindling next to the fire pit as I gather all my materials.
We’ll discuss how to construct the fire in a minute.
Kindling should always be dry and works well when it doesn’t have bark on it as bark usually takes longer to catch a flame than splintered wood. Break the kindling up into smaller pieces if you don’t think it will burn well. Sometimes it’s best to split small shafts of wood off of larger logs, especially if that’s all you have. You can do this with a hatchet without too much effort.

Fuel
The fuel is what the fire is all about. This is the stuff that you use tinder and kindling for. Fuel should be larger in diameter than your wrist, but not so huge that you’ll only be able to burn the outside layer and then be left with a big hunk of charred wood when you’re ready to put the fire out. Just add more logs, don’t add a whole tree.
Your fuel should be dry and should never be harvested from living or standing trees as I mentioned earlier.

Once you have a pile of fuel large enough to last you as long as you plan to be sitting around the fire, it’s time for the pyrotechnics.
Methods of building a fire
You’ve probably seen the various methods of fire construction – log cabin, tepee, lean too. They each have their place with pros and cons, but in the end, you’ll pretty much always end up with a pile of burning logs, so don’t worry too much about which one you use.
Some people will say the tepee is better for a cooking fire and the log cabin is better for a long heating fire. All else equal, that may be true, but I usually choose a construction method for my camping fire based on the size and shape of my fire pit, the size of my kindling and fuel, and the weather conditions.
Here are the methods and when I choose to use each one.
Tepee

A tepee fire is quick and simple to build. You just stack some pieces of kindling up in a tepee shape and gradually add larger pieces of kindling and fuel to the outside of the tepee leaving a gap where you can insert the tinder and light the fire.
Tepee fires are great when you need heat fast. They provide great oxygenation to the fuel so it tends to light up quickly. As they burn the tepee tends to fall over and burning logs can land outside the fire ring if you’re not paying attention. This isn’t a problem if you have a shovel handy.
Lean-to
Lean-to fires are great when the weather is nasty and the wind is blowing. To build a lean-to camping fire, you just stack some long pieces of kindling on a rock or large and stable log. If the log or rock can be positioned to create an overhang to protect your tinder from wind and water. To avoid wind issues, it’s best to position the large rock or log perpendicular to the direction of the wind.

Stack a good pile of kindling on top of the rock or log and follow it with some larger fuel-size log. you can cover one exposed side of the lean-to, but leave one side open to insert your tinder and light the fire when you’ve got the rest of the wood in place.
The drawback of the lean-to is that you have to find the right size log or rock to make it work properly, but other than that, this one is a great option for a camping fire.
Log Cabin
The log cabin is a classic. It’s great as far as most camping fires go because it’s ideal for long burns and for cooking. To build a log cabin campfire, you just clear a flat area in your pit, set a base of kindling, and set and light your tinder in the middle of it. Once things are burning, you can start to stack larger logs around the outside just like a Lincoln log cabin. After a few layers, you can layer more kindling across the middle of the stack.

Keep stacking as you need. If you plan to cook on the fire, you can stack your pan or pot on top of the logs, but keep an eye on them so you don’t lose your dinner to the flames.
One drawback to the log cabin is that they take a lot of wood to build and can end up being larger than you may need.
Pile of sticks
Okay, so if you’re at all like me, sometimes I throw all these traditional types of camping fires out the window and just end up burning a pile of sticks. While my kids are off gathering dry wood, I often build my tinder nest and just start piling up the tinder with a space underneath for the tinder ball to go. Once things are burning, I’ll start to strategically throw some larger full-size logs on top of it.

Troubleshooting firestarting
Sometimes when you’re building a camping fire, things just don’t seem to light up. While you’re inhaling smoke, getting frustrated with yourself and others, and getting colder and/or darker, isn’t the place to figure out the nuances of fire science.
I also won’t attempt to teach a full course on fire science, but knowing the basics will get you much further than fumbling around on your knees with a dwindling supply of matches.
Fires need three elements to exist: heat, oxygen, and fuel.
Heat – This one should be pretty obvious. This will come from your lighter, matches, sparks from flint and steel, or if you’re a bit crazy, a bow drill. If you don’t have a source of heat, your fire won’t start. One issue you may run into with this one is that the heat needs to be applied until the fuel material exceeds its kindling point – which is when it will ignite in flames.

If your fuel is too wet, you’ll need much more heat to get it to a high enough temperature to ignite, so always use dry wood!
Oxygen – This one makes sense. Fires don’t burn in vacuums. You need to ensure your fire can breathe. That’s why we stack the tinder on top of things and keep space between all the elements. If you smother your fire with too much wood, paper, cardboard … whatever … it will die.
For troubleshooting a fire that won’t start, often it needs a bit more oxygen. This is why people blow on fires. Gently blowing on the fire so it doesn’t blow out, but gets a bit more oxygen will get it burning hotter and faster. Just don’t inhale the smoke.
Fuel – All fires need fuel. That’s what’s actually burning. For camping fire we use wood. Don’t burn your trash unless it can burn completely(no aluminum, plastic, or glass).
To get wood to burn it has to heat up enough to ignite. This means the fuel has to have enough surface area in contact with the heat source and the oxygen to get lit. The key here is to use small enough pieces of (dry) wood.
Tending a burning fire
So once you’re sitting around a cozy flame, you still need to be continually vigilant around the fire. Not only do you need to keep feeding wood into it to keep it burning nicely. You also don’t want to add too much fire or you’ll end up staying up all night until it burns down to ash.
If you’ve got kids in camp, you need to keep a constant eye on them. Not only can children get seriously injured in a campfire, but they love to play with the fire and can easily fling a spark or flaming stick into the dry brush nearby and – game over.
Even if you don’t have kids, anytime you’ve got a fire burning, you must keep an eye on it at all times. It’s your responsibility to keep the fire under control.
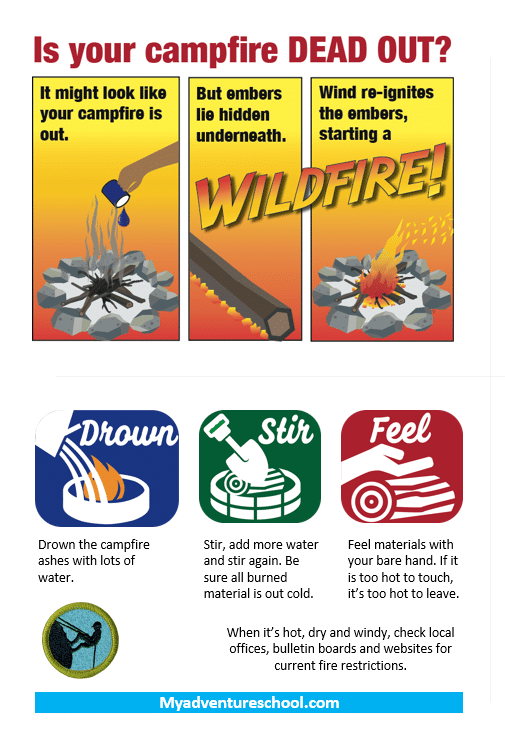
Extinguishing a fire
Once the large chunks of wood are burned down to ash and you’re ready to hit the sack or break camp, you’ll need to put the fire out – dead out! This means you can comfortably put your hand in the fire for several seconds.
To extinguish your fire, stir it up to break up any hot spots, grab the bucket of water and pour about half of it out across the coals. Stir the fire pit around a bit and pour the rest of the water on the fire pit. Stir it around a bit more and repeat as necessary until it’s dead out.
If you don’t have any water, you can use sand to extinguish the fire, but don’t bury the fire. Burying hot coals in sand or soil will insulate them and can allow them to smolder. I’ve seen a tree root 10 feet away from the fire pit smoking and smoldering from a buried fire pit from a group before us. Fortunately, we figured it out before the forest burnt down.
Cleaning up a campfire pit
Before you leave camp, it’s your responsibility to leave no trace. This means if you built a fire pit, it shouldn’t be detectable when you leave. To clean up your fire pit, you’ll need to spread the ashes out and ensure no large coals remain. Smash them down to ash or pack them out. Put the rocks back where you got them with the charred side hiding. Nobody wants to sit on a rock and get a big suit mark on their butt.
Fill in the hole you dug and do your best to put the brush and scrub back around the area you cleared so it isn’t visibly noticeable that it was cleared out. As I try to teach my kids – be a ninja and don’t let anyone know you were ever here.
If your camping fire was in a designated fire pit, ensure there isn’t any trash in the pit and you’re good.
Now you know how to efficiently, safely, and responsibly use fire when camping.
If you’ve got other tips or thoughts on building a fire, share them with everyone below in the comments.


